Procedure Overview
This process involves the following steps:
- Upgrade to the most recent BIOS from Dell:
- Installing Required Software and drivers.
- Backing up your current BIOS.
- Adding NVMe driver support into the BIOS backup.
- Writing the modified BIOS back to the system.
- Optimising BIOS settings.
Install the Required Drivers and Software
Before being able to read from or write to the BIOS, you need to install Intel Management Engine drivers. But instead of installing them from Dell, get these more up to date drivers from Lenovo.
Next, download the Intel Management Engine System Tools v7 r2, which contains the tools required to flash the new bios.
Also download the NVME Driver which will be injected into the BIOS Image.
Finally you will need UEFI Tool 0.28 to make the actual BIOS modification. Here is a direct link to that version.
Put the machine into Service Mode
Now that you have the machine prepared, you need to put the machine into service mode before you can proceed:
- Shut the machine down.
- Remove the mains power supply.
- Locate the two pin service connector and put a jumper on it.
If you are upgrading a Small Form Factor machine, the service jumper is in an awkward position which will require you to remove the Optical Drive and Hard Drive cage to access it. Once those are out of the way, you can find near the RAM slots. Here is an image of the motherboard from a 790 SFF:
If you do not have a spare jumper, you can borrow the one from the Password reset jumper. Simply shift the jumper from the password pins to the service mode pins
You can now boot the machine again in service mode, but you will receive a couple of warning messages.
If you do not put the machine into service mode you will not be able to backup or update the BIOS properly.
Modify and Upgrade the BIOS
Now that you are in service mode, you can continue with the backup and modification.
Backup the existing BIOS
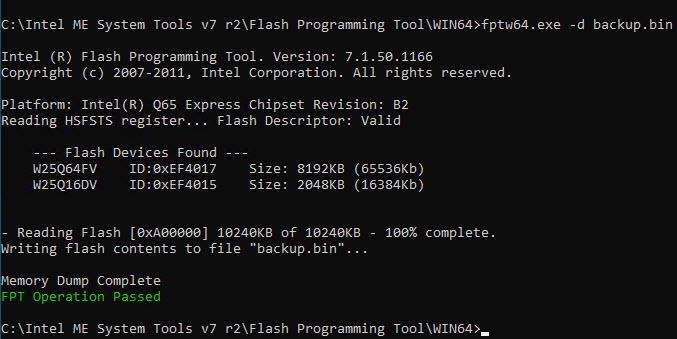
Open a command prompt as an administrator and change to the directory where you extracted the Intel ME System Tools. Then navigate to the subdirectory \Flash Programming Tool\WIN64 (or WIN32 if you are on 32-Bit installation).
Within that directly use the command:
fptw64.exe -d backup.bin
Modify the BIOS and Inject the NVMe Driver
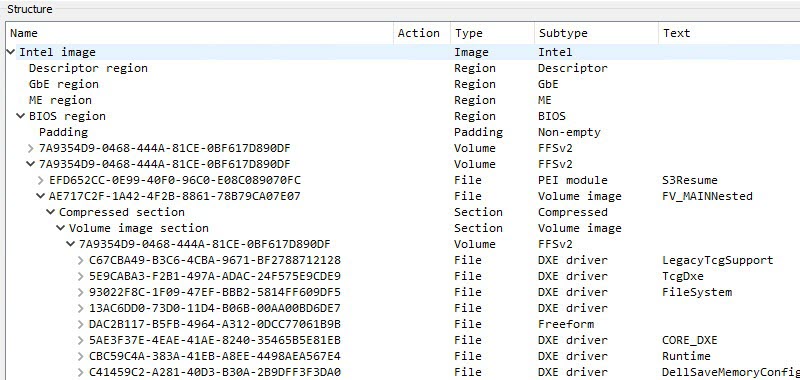
Next, open UEFI Tool and open the backup.bin file. Expand the sections as per the following screenshot:
Scroll to the bottom of this section and you should see an area that looks like this:
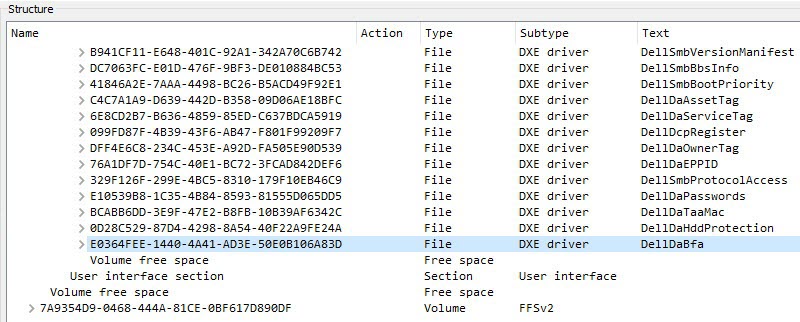
Next, right click on item with the name E0364FEE-1440-4A41-AD3E-50E0B106A83D and choose Insert After.
Choose the file NvmExpressDxe_Small.ffs that you just downloaded earlier and you will see it appear right after the DellDaBfa section:
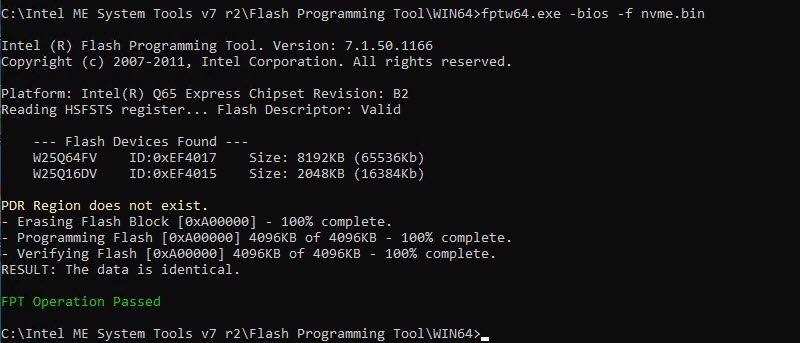
Now go to File -> Save Image File and save the file as nvme.bin and put it in the same location as the flash tool. Go back to your command prompt and run the command:
fptw64.exe -bios -f nvme.bin
Shut down the machine and remove the jumper from the service pins and move it back to the password reset pins if you took it from there.
The BIOS modification is complete!
Install the PCI NVMe SSD
If you have not yet installed your SSD into the machine, you can do it now.
Optimise BIOS Settings
Now that you have written the new BIOS, restart the machine. If you do not have any SATA drives connected you will receive a warning on start-up that says:
Alert! Hard Drive not found
You can fix this by going into the BIOS Setup and then System Configuration -> Drives. Untick all the SATA ports which do not have drives connected.
Finally, if you want the maximum possible speed from your new drive, consider disabling C-States in the BIOS. This makes it marginally faster, but I doubt you would notice much difference.
Enjoy your NVMe Enabled OptiPlex 790 / 990
Now you can install an operating system of your choice or clone one of your existing drives to your new NVMe drive and enjoy a decent performance increase.
In my opinion, upgrading the Dell OptiPlex 790 or 990 with PCI NVMe Solid State drive is a brilliant value upgrade. If an old machine can be given a new lease of life, then that is a great win. The performance boost if you are upgrading from a mechanical hard drive will be huge.
On my machine I can boot to the Windows 10 Desktop in 11 seconds. The configuration of my machine is:
- Intel Core i5-2400
- 16Gb Ram (4 x 4Gb)